Visual Studio Code 입문
VS 코드 시작하기
바탕화면에 폴더 추가 -> 그 안에 또 다른 폴더 만들기
VS코드 -> 열기 -> 속 폴더 선택 -> 오른쪽 마우스 -> 새 파일
-> html:5 (기본값) 입력
<!DOCTYPE html>
<html lang="en">
<head>
<meta charset="UTF-8">
<meta name="viewport" content="width=device-width, initial-scale=1.0">
<title>Document</title>
</head>
<body>
</body>
</html>
=> 크게 헤드와 바디로 나뉨
* 헤드 : 페이지 속성, CSS 등
* 바디 : 페이지 내용
기초 태그
<body>
<!-- 구역을 나누는 태그들 -->
<div>나는 구역을 나누죠</div>
<p>나는 문단이에요</p>
<ul>
<li> bullet point!1 </li>
<li> bullet point!2 </li>
</ul>
<!-- 구역 내 콘텐츠 태그들 -->
<h1>h1은 제목을 나타내는 태그입니다. 페이지마다 하나씩 꼭 써주는 게 좋아요. 그래야 구글 검색이 잘 되거든요.</h1>
<h2>h2는 소제목입니다.</h2>
<h3>h3~h6도 각자의 역할이 있죠. 비중은 작지만..</h3>
<hr>
span 태그입니다: 특정 <span style="color:red">글자</span>를 꾸밀 때 써요
<hr>
<hr>
<hr>
input 태그입니다: <input type="text" />
<hr>
button 태그입니다: <button> 버튼입니다</button>
<hr>
textarea 태그입니다: <textarea>나는 무엇일까요?</textarea>
</body>
padding : 안쪽 여백
margin: 50px auto 0px auto;
- margin : 바깥 여백 (위, 오른쪽, 아래, 왼쪽 순서)
background-image: url('');
background-position: center;
background-size: cover;
- backgroud 항상 함께 다니는 친구들
CSS 기초
<head>...</head> 안에 <style>...</style> 이라는 공간을 만들어 사용
예를 들어 wrap 이라는 클래스에 적용하려면
.wrap { } 이라고 입력하면 됨
<head>
<style>
.wrap { }
</style>
</head>
클래스는 바디 안 에 있는 태그에 입힌다.
예를 들어 <div>태그에 클래스가 Wrap이라는 이름표를 붙일 수 있음 (CSS에서 태그를 지정하여 꾸미기 위해)
<body>
<div class="wrap">
</div>
</body>
CSS 폰트
강의에서 튜터님은 import를 선택하고 스타일에 코드를 넣으라고 하셨는데
어째서인지 적용이 안 되는 이슈 발생,, 따라서 새로운 방법을 찾아보았다.
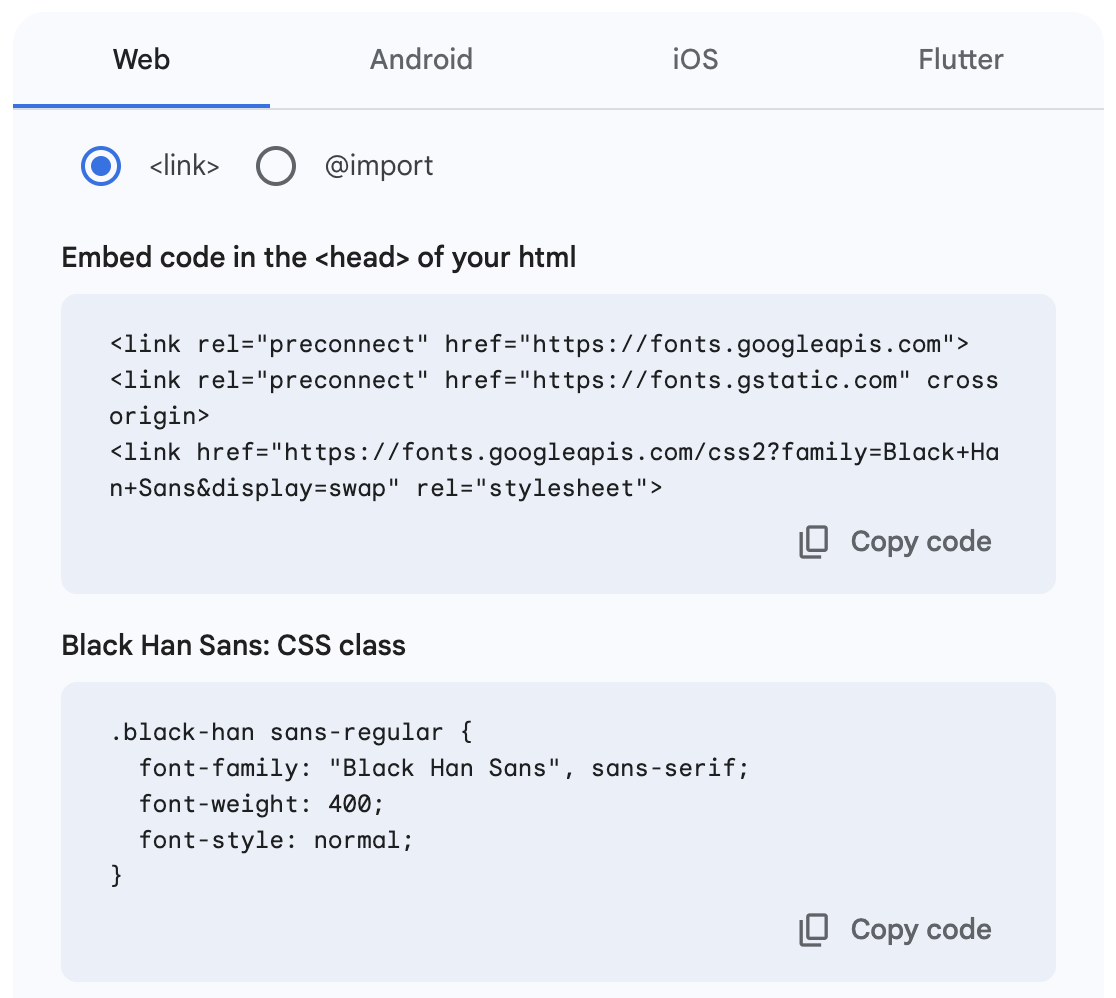
1. link 선택
2. <head>에 <title>바로 아래에 코드 복붙
폰트 코드 복붙하기 => 폰트를 가져오겠다.
3. <style> 에 * { } 넣고 중괄호 안에 font-family 복붙
* { } 넣고 font-family 넣기 => 모든 태그에 폰트를 적용하겠다.
* { } => 모든 태그
<style>
* {
font-family: "Black Han Sans", sans-serif;
font-weight: 400;
font-style: normal;
}
 적용된 모습
추억 앨범 프로젝트
부트스트랩 사용하기
제일 먼저 타이틀 아래에 부트스트랩 CDN 입력 (꾸러미를 가지고 옴)
<link href="https://cdn.jsdelivr.net/npm/bootstrap@5.0.2/dist/css/bootstrap.min.css" rel="stylesheet"
integrity="sha384-EVSTQN3/azprG1Anm3QDgpJLIm9Nao0Yz1ztcQTwFspd3yD65VohhpuuCOmLASjC" crossorigin="anonymous">
=> 다른 사람이 작성한 CSS를 사용하기 위해
<link
rel="stylesheet"
integrity="sha384-EVSTQN3/azprG1Anm3QDgpJLIm9Nao0Yz1ztcQTwFspd3yD65VohhpuuCOmLASjC"
crossorigin="anonymous"
/>
https://getbootstrap.com/docs/5.3/components/buttons/
Buttons
Use Bootstrap’s custom button styles for actions in forms, dialogs, and more with support for multiple sizes, states, and more.
getbootstrap.com
부트스트랩 안에서 필요한 태그 가져와 사용하기!
CSS <div> 가운데 정렬

display: flex;
flex-direction: column;
align-items: center;
justify-content: center;
세트! 바뀌는 건 flex-direction: 에서 column or low

버튼 꾸미기
</head>
<body>
<div class="mytitle">
<h1>나만의 추억앨범</h1>
<button>추억 저장하기</button>
</div>
</body>
여기서 mytitle 안에 있는 <button> 태그를 꾸미고 싶다면,
CSS >>
<style>
.mytitle > button {
}
</style>
이라고 치면 (mytitle 이라는 클래스 안에 있는 Button 태그를 지정 가능)
박스에 그림자 넣기
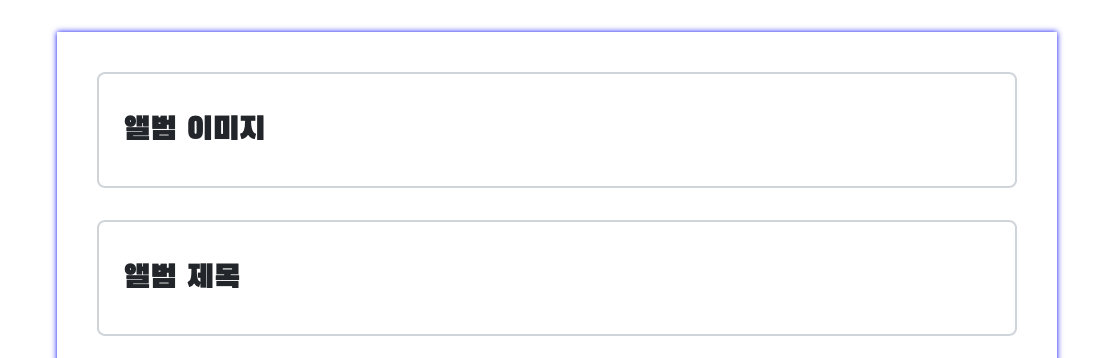
.mypostingbox {
width: 500px;
margin: 30px auto 0px auto;
padding: 20px;
box-shadow: 0px 0px 3px 0px blue;
box-shadow: 0px 0px 3px 0px blue; 에서
offset-x(양수면 오른쪽, 음수면 왼쪽)
offset-y(양수면 아래, 음수면 위)
blur-radius (숫자가 커질수록 블러처리되어 흐려짐)
spread-radius(숫자가 커질수록 그림자가 커짐)
color 순으로 입력
완성
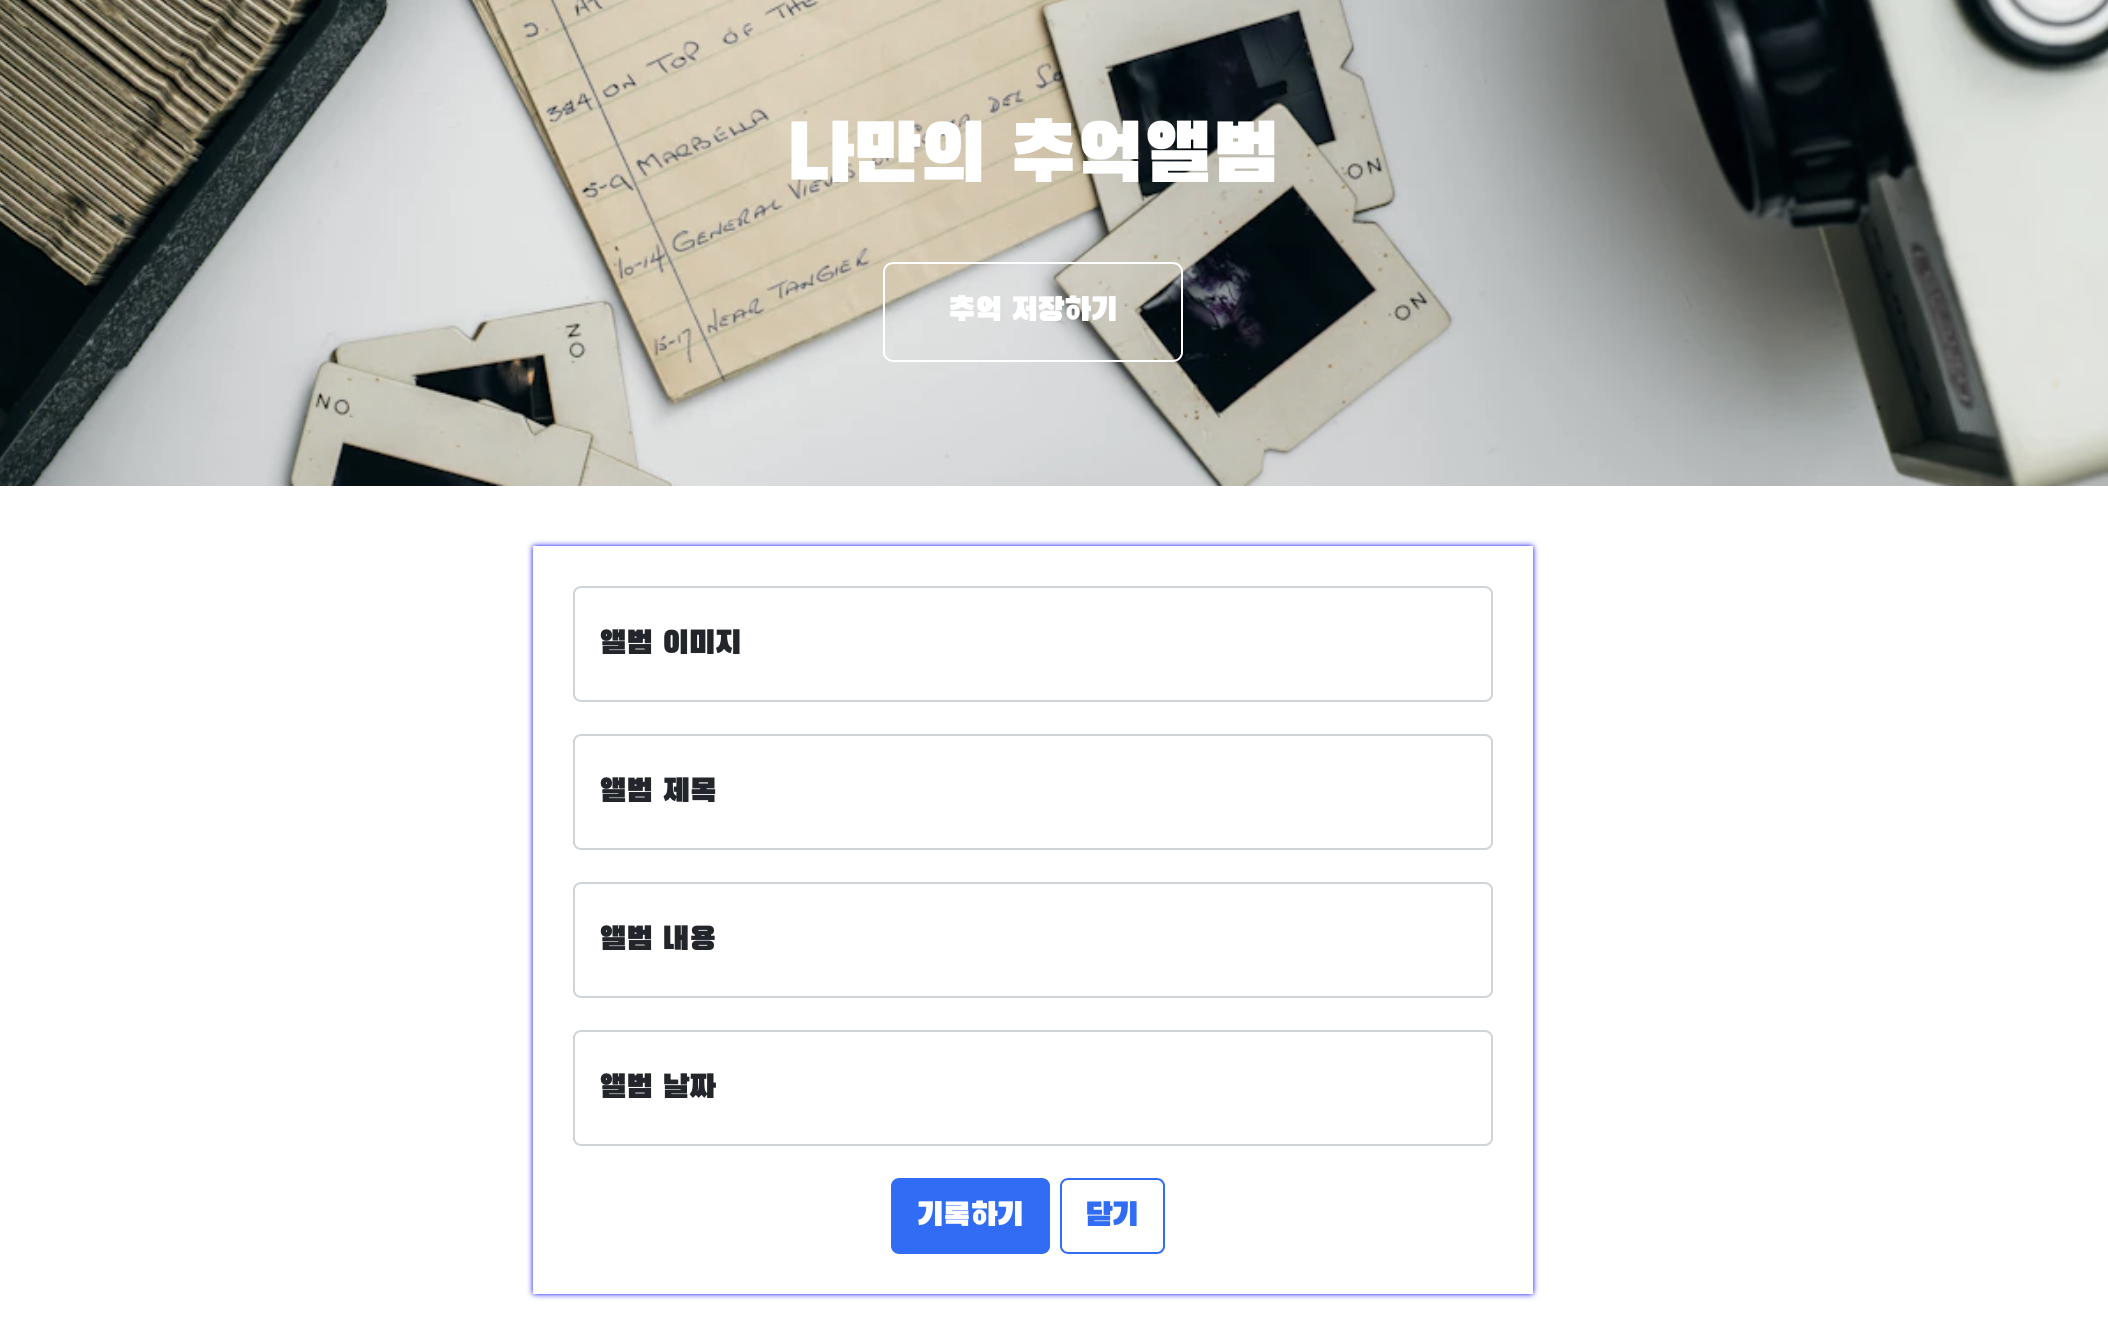

<!DOCTYPE html>
<html lang="en">
<head>
<meta charset="UTF-8" />
<meta name="viewport" content="width=device-width, initial-scale=1.0" />
<title>나만의 추억앨범</title>
<link
rel="stylesheet"
/>
<link
rel="stylesheet"
integrity="sha384-EVSTQN3/azprG1Anm3QDgpJLIm9Nao0Yz1ztcQTwFspd3yD65VohhpuuCOmLASjC"
crossorigin="anonymous"
/>
<style>
* {
font-family: "Black Han Sans", sans-serif;
font-weight: 400;
font-style: normal;
}
.mytitle {
color: white;
height: 250px;
display: flex;
flex-direction: column;
align-items: center;
justify-content: center;
background-position: center;
background-size: cover;
}
.mytitle > button {
width: 150px;
height: 50px;
background-color: transparent;
color: white;
border: 1px solid white;
border-radius: 5px;
margin-top: 20px;
}
.mycards {
width: 800px;
margin: 30px auto 0px auto;
}
.mypostingbox {
width: 500px;
margin: 30px auto 0px auto;
padding: 20px;
box-shadow: 0px 0px 3px 0px blue;
}
.mybtn {
display: flex;
flex-direction: low;
align-items: center;
justify-content: center;
}
.mybtn > button {
margin-right: 5px;
}
</style>
</head>
<body>
<div class="mytitle">
<h1>나만의 추억앨범</h1>
<button>추억 저장하기</button>
</div>
<div class="mypostingbox">
<div class="form-floating mb-3">
<input type="email" class="form-control" id="floatingInput"
placeholder=앨범 이미지" />
<label for="floatingInput">앨범 이미지</label>
</div>
<div class="form-floating mb-3">
<input type="email" class="form-control" id="floatingInput"
placeholder=앨범 제목" />
<label for="floatingInput">앨범 제목</label>
</div>
<div class="form-floating mb-3">
<input type="email" class="form-control" id="floatingInput"
placeholder=앨범 내용" />
<label for="floatingInput">앨범 내용</label>
</div>
<div class="form-floating mb-3">
<input type="email" class="form-control" id="floatingInput"
placeholder=앨범 날짜" />
<label for="floatingInput">앨범 날짜</label>
</div>
<div class="mybtn">
<button type="button" class="btn btn-primary">기록하기</button>
<button type="button" class="btn btn-outline-primary">
닫기
</button>
</div>
</div>
<div class="mycards">
<div class="row row-cols-1 row-cols-md-4 g-4">
<div class="col">
<div class="card h-100">
<img
class="card-img-top"
alt="..."
/>
<div class="card-body">
<h5 class="card-title">앨범 제목</h5>
<p class="card-text">앨범 내용</p>
</div>
<div class="card-footer">
<small class="text-body-secondary">앨범 날짜</small>
</div>
</div>
</div>
<div class="col">
<div class="card h-100">
<img
class="card-img-top"
alt="..."
/>
<div class="card-body">
<h5 class="card-title">앨범 제목</h5>
<p class="card-text">앨범 내용</p>
</div>
<div class="card-footer">
<small class="text-body-secondary">앨범 날짜</small>
</div>
</div>
</div>
<div class="col">
<div class="card h-100">
<img
class="card-img-top"
alt="..."
/>
<div class="card-body">
<h5 class="card-title">앨범 제목</h5>
<p class="card-text">앨범 내용</p>
</div>
<div class="card-footer">
<small class="text-body-secondary">앨범 날짜</small>
</div>
</div>
</div>
<div class="col">
<div class="card h-100">
<img
class="card-img-top"
alt="..."
/>
<div class="card-body">
<h5 class="card-title">앨범 제목</h5>
<p class="card-text">앨범 내용</p>
</div>
<div class="card-footer">
<small class="text-body-secondary">앨범 날짜</small>
</div>
</div>
</div>
</div>
</div>
</body>
</html>
오늘 학습한 Visual Studio Code 단축키
저장 [Ctrl]+[s]
브라우저로 열기 [Alt]+[B]
태그 자동 정렬 [Alt]+[Shift]+[F]
한 줄 이동 [Alt]+[방향키]
커서 위 빈줄 생성 [Shift]+[Ctrl]+[Enter]
커서 아래 빈줄 생성 [Ctrl]+[Enter]
줄 삭제 [Ctrl]+[Shift]+[K]
줄 잘라내기 [Ctrl]+[X]
줄 복사 [Ctrl]+[C]
주석 [Ctrl]+[/]
좌측 탐색창 열기/닫기 [ctrl]+[B]
